Your browser doesn't support JavaScript mfc – Page 2 – Windows Programming

Scrollbar

The most common scrollbar messages are

SB_LINEUP – is sent when the scrollbar moves up one position
SB_LINEDOWN – is sent when the scrollbar moves down one position
SB_PAGEUP – is sent when the scrollbar is moved up one page
SB_PAGEDOWN – is sent when the scrollbar is moved down one page
SB_LINELEFT – is sent when the scrollbar is moved left one position
SB_LINERIGHT – is sent when the scrollbar is moved right one position
SB_PAGELEFT – is sent when the scrollbar is moved one page left
SB_PAGERIGHT – is sent when the scrollbar is moved one page right
SB_THUMBPOSITION – is sent after the thumbbar is dragged to a new position
SB_THUMBTRACK – is sent while the thumbbar is dragged to a new position

The CScrollbar member function SetScrollRange is used to set the minimum and maximum scroll box positions and the GetScrollPos() and SetScrollPos() member functions retrieves/sets the current position of the scroll box (thumb).

Scrollbar information is passed to the parent windows by use of the ON_WM_VSCROLL and ON_WM_HSCROLL message macros

For further reading on the CScrollBar class
https://docs.microsoft.com/en-us/cpp/mfc/reference/cscrollbar-class?view=vs-2019


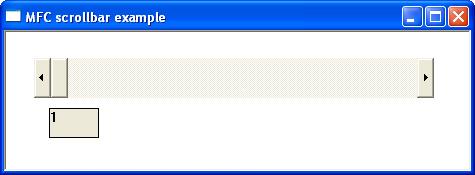
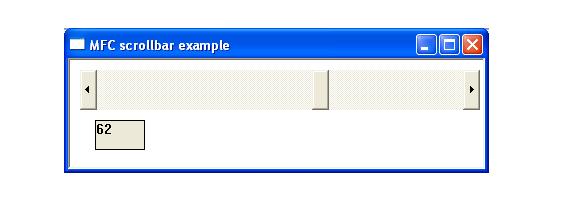
The following short program demonstrates a horizontal scrollbar control. The scrollbar position is shown in the static class.
#include <afxwin.h>
#define ID_SCROLLBAR   1000
#define ID_STATIC   1001
class CSimpleApp : public CWinApp
{
public:
BOOL InitInstance();
};

class CMainFrame : public CFrameWnd
{
public:
CMainFrame();
afx_msg void SetLabel(int );
afx_msg void OnHScroll(UINT , UINT nPos, CScrollBar* );
DECLARE_MESSAGE_MAP()
CScrollBar wScrollbar;//instantiate scrollbar
CStatic wStatic;
};


BOOL CSimpleApp::InitInstance(){
m_pMainWnd = new CMainFrame();
m_pMainWnd->ShowWindow(m_nCmdShow);
return TRUE;
}

CMainFrame::CMainFrame()
{
Create(NULL, _T("MFC scrollbar example"), WS_OVERLAPPEDWINDOW ,CRect(25,25,450,170));

wStatic.Create(_T(""),WS_CHILD | WS_VISIBLE | WS_BORDER , CRect(25,60,75,90), this, ID_STATIC);
wScrollbar.Create(WS_CHILD | WS_VISIBLE | SBS_HORZ, CRect(10, 10, 410, 50), this, ID_SCROLLBAR );
wScrollbar.SetScrollRange(1,100,true);//set scroll bar range
int p=wScrollbar.GetScrollPos();
SetLabel(p);
}
BEGIN_MESSAGE_MAP(CMainFrame,CFrameWnd)
ON_WM_HSCROLL()
END_MESSAGE_MAP()
CSimpleApp MFCApp1;

//deals with scrollbar scrolling
afx_msg void  CMainFrame::OnHScroll(UINT nSBCode, UINT nPos, CScrollBar* pScrollBar)
{

int minpos;
int maxpos;
pScrollBar->GetScrollRange(&minpos, &maxpos); 
int curpos = pScrollBar->GetScrollPos();
switch(nSBCode)
{
case SB_LEFT:         //Scrolls to the lower right. 
curpos = minpos;
break;

case SB_RIGHT:         //Scrolls to the lower right.
curpos = maxpos;
break;

case SB_ENDSCROLL:      //Ends scroll. 
break;

case SB_LINEDOWN:       //Scrolls one line down. 
curpos++;
break;

case SB_LINEUP:         //Scrolls one line up.
curpos--;
break;

case SB_PAGEDOWN:       //Scrolls one page down.
curpos+=5;
break;

case SB_PAGEUP:         //Scrolls one page up. 
curpos-=5;
break;

case SB_THUMBPOSITION:  //The user has dragged the scroll box (thumb) and released the mouse button. The nPos parameter indicates the position of the scroll box at the end of the drag operation. 
curpos = nPos;
break;

case SB_THUMBTRACK:     //The user is dragging the scroll box. This message is sent repeatedly until the user releases the mouse button. The nPos parameter indicates the position that the scroll box has been dragged to. 
curpos = nPos;
break;
}

pScrollBar->SetScrollPos(curpos);
SetLabel(curpos);
}

//display value of scollbar in label
afx_msg void CMainFrame::SetLabel(int newvalue)
{
CString conv;
conv.Format(_T("%d"), newvalue);
wStatic.SetWindowText (_T (conv));
}
Child Windows – Adding Controls

A child window is a window that exists inside and is owned by a parent window. Child windows are commonly used to implement controls such as buttons, edit boxes, list boxes, and scroll bars. They receive keyboard and mouse input when they have the input focus and notify the parent window of significant events, such as button clicks or changes to their state, by sending notification messages.

Standard controls are created by instantiating one of the MFC control classes and calling the object’s Create() member function.

Windows makes the classic controls available to the application programs it hosts by registering six predefined WNDCLASS’s. The control types, their WNDCLASS’s, and the corresponding MFC classes are shown in the following table.

Control TypeWNDCLASSMFC Class
Buttons“BUTTON”CButton
List boxes“LISTBOX”CListBox
Edit controls“EDIT”CEdit
Combo boxes“COMBOBOX”CComboBox
Scroll bars“SCROLLBAR”CScrollBar
Static controls“STATIC”Cstatic

Buttons

MFC’s CButton class encapsulates all Windows button controls. Depending on the style specified when the control is created, a CButton object can represent a push button, check box, radio button, group box or owner-drawn button.

Checkbox

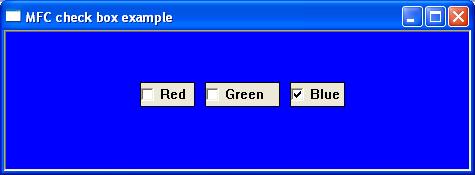
A checkbox is a small square box with an associated descriptive label. Checkboxes function as a toggle switch switch between selected and de-selected. Clicking the box once causes a checkmark to appear; clicking again toggles the checkmark off. The CButton member functions GetCheck() and SetCheck() retrieve and modify the check state of a checkbox. The ON_BN_CLICKED message-map macro maps button click notifications to a handler function.

The following short program uses 3 checkboxes to change the window’s background colour. Selecting combinations of each produces a mixture of red, green and blue. The initial default background colour is black, while selecting all 3 buttons will produce white.


RadioButton

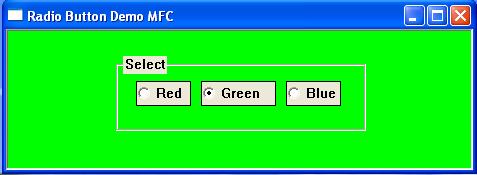
A radio button is a small circular box with an associated descriptive label. Radio buttons are normally grouped so the user can choose only one of a predefined set of mutually exclusive options. Selecting one automatically clears the previously selected button. The following short program uses three radio buttons to change the window’s background colour.


For a further reading on the CButton class
https://docs.microsoft.com/en-us/cpp/mfc/reference/cbutton-class?view=vs-2019


Static control

MFC’s CStatic class encapsulates the Windows static control. Static controls are commonly used as labels for other controls. A static control displays text, shapes and pictures such as icons or bitmaps. The static control cannot be selected, accept input from the keyboard or mouse, and does not send WM_COMMAND messages back to the parent window.

For further reading on the CStatic classes
https://docs.microsoft.com/en-us/cpp/mfc/reference/cstatic-class?view=vs-2019


Editbox

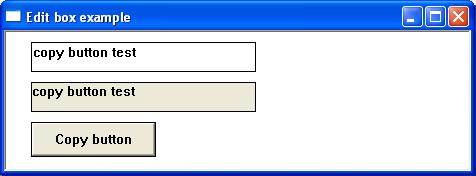
MFC’s CEdit class encapsulates the functionality of edit controls. Edit controls support both single-line and multiline text entry. They provide functions for retrieving and modifying text, selecting text, limiting the number of characters entered and responding to user editing operations. Edit controls come in two varieties: single-line and multiline,

For further reading on the CEdit class
https://docs.microsoft.com/en-us/cpp/mfc/reference/cedit-class?view=vs-2019

In the following example clicking the button title ‘set button’ changes the contents of the static box to the value of the textbox.


ScrollBar

MFC’s CScrollBar class encapsulates scroll bar controls. A scroll bar is an object that allows the user to adjust a particular value, a section of the window or view, by navigating either left and right or up and down. A scroll bar appears as a long bar with a small button at each end. Between these buttons, there is a moveable bar called a thumb. Scrollbars exist in two forms: the standard scroll bar and the scroll bar control. The standard scroll bar is an integral part of a window, whereas the scroll bar control exists as a separate control

For further reading on the CScrollBar class
https://docs.microsoft.com/en-us/cpp/mfc/reference/cscrollbar-class?view=vs-2019

The following short program demonstrates a horizontal scrollbar control. The scrollbar position is shown in the static class.


Listbox

MFC’s Clistbox Class encapsulates the Windows listbox control. A listbox displays a list of selectable items in a scrollable box. Users can select or deselect one or more of these items by clicking the appropriate line of text. For further reading on the CListBox class
https://docs.microsoft.com/en-us/cpp/mfc/reference/clistbox-class?view=vs-2019

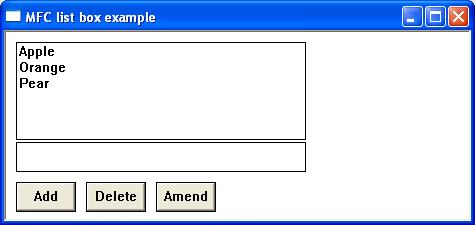
The following short program creates a listbox and then adds a limited number of selectable items. Clicking an item copies the selected list box item into the static control.Clicking the add button adds a new record, clicking the amend button amends the selected listview value, and clicking the delete button deletes the selected listbox item.


Combo Box

MFC’s CComboBox class encapsulates the functionality of the ComboBox controls. A combo box or drop-down list is a combination of a listbox and editbox, allowing the user to either type a value directly or select a value from the list. Depending on the style selected, a combo box may permit the user to type a value directly, select only from the list, or use an editable drop-down list

For further reading on the CComboBox class
https://docs.microsoft.com/en-us/cpp/mfc/reference/ccombobox-class?view=vs-2019

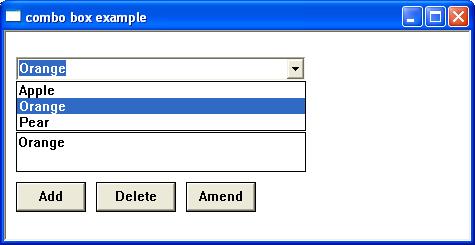
The following short program displays a dropdown list or combo box. Items can be added deleted or amended using the textbox and the appropriate button.


Menus

In Windows, a menu bar is a horizontal bar displayed immediately below the title bar. It typically contains a collection of drop-down menus such as File, Edit, and Help. Each drop-down menu can contain commands, separators, or nested submenus.

Although menus can be created entirely in code, most MFC applications define their menus in a resource file and then load them at run time. Creating menus programmatically is useful when menu items need to be generated dynamically.

Adding Menus

To create and maintain menus programmatically, the developer will need to instantiate a class CMenu object and then use one of the following member functions to create the menu items.

CreateMenu

Is used to create a top-level menu. The prototype of this function is

BOOL CreateMenu( );

Returns nonzero if the menu creation was successful. 0 if menu creation failed


CreatePopupMenu

Creates a pop-up menu and attaches it to the CMenu object. The prototype of this function is

BOOL CreatePopupMenu( );

Return Nonzero if the pop-up menu was successfully created; 0 if menu creation failed


AppendMenu

Appends a new item to the end of a menu. The prototype of this function is

BOOL AppendMenu( UINT nFlags, UINT nIDNewItem = 0, LPCTSTR lpszNewItem = NULL); BOOL AppendMenu( UINT nFlags, UINT nIDNewItem, const CBitmap* pBmp );

nFlags – Specifies information about the state of the new menu item.
nIDNewItem – Specifies either the command ID of the new menu item or, if nFlags is set to MF_POPUP, the menu handle ( HMENU) of a pop-up menu.
lpszNewItem – Specifies the content of the new menu item.
pBmp – Points to a CBitmap object that will be used as the menu item.

Common values for nFlags include:

  • MF_STRING – Adds a text menu item.
  • MF_SEPARATOR – Adds a separator line.
  • MF_POPUP – Adds a submenu.
  • MF_CHECKED – Displays a check mark beside the item.
  • MF_GRAYED – Displays the item disabled.

For further detailed reading
https://docs.microsoft.com/en-us/cpp/mfc/reference/cmenu-class?view=vs-2019#appendmenu


The on_command Macro

The ON_COMMAND message-map macro maps a command message to a member function. It is most commonly used to respond to menu selections, but it can also be used to handle commands generated by toolbar buttons, accelerator keys, and other controls.

The prototype for this macro is

ON_COMMAND(id, memberFunction)

Where

  • id – Specifies the command identifier associated with the menu item or control.
  • memberFunction – Specifies the member function that will process the command.

The corresponding message handler has the prototype

afx_msg void OnMsgName();

For example, the following message-map entry associates the menu item ID_FILE_OPEN with the member function OnFileOpen():

BEGIN_MESSAGE_MAP(CMainFrame, CFrameWnd)
    ON_COMMAND(ID_FILE_OPEN, OnFileOpen)
END_MESSAGE_MAP()

The corresponding handler is

afx_msg void CMainFrame::OnFileOpen()
{
    AfxMessageBox(TEXT("File Open selected"));
}

When the user selects the File Open menu item, MFC automatically routes the command message to OnFileOpen().


The on_command_range Macro

When several menu items perform similar operations, they can all be mapped to a single handler using the ON_COMMAND_RANGE macro.

The prototype for this macro is

ON_COMMAND_RANGE(id1, id2, memberFunction)

Where

  • id1 – Specifies the first command identifier in the range.
  • id2 – Specifies the last command identifier in the range.
  • memberFunction – Specifies the member function that will process all commands in the range.

For this macro to work, the command identifiers must form a contiguous sequence.

The corresponding handler has the prototype

afx_msg void OnMsgName(UINT nID);

Where

  • nID – Specifies the command identifier of the selected menu item.

For example:

BEGIN_MESSAGE_MAP(CMainFrame, CFrameWnd)
    ON_COMMAND_RANGE(ID_COLOUR_RED,
                     ID_COLOUR_BLUE,
                     OnSelectColour)
END_MESSAGE_MAP()

The handler can then determine which menu item was selected by examining the value of nID:

void CMainFrame::OnSelectColour(UINT nID)
{
    switch (nID)
    {
        case ID_COLOUR_RED:
            // Handle red.
            break;

        case ID_COLOUR_GREEN:
            // Handle green.
            break;

        case ID_COLOUR_BLUE:
            // Handle blue.
            break;
    }
}

Using ON_COMMAND_RANGE simplifies the message map when several menu items require similar processing and avoids the need to write separate message handlers for each command.


Modifying Menus Programmatically

In addition to creating menus dynamically, menus can all be modified dynamically.

InsertMenu

Inserts an item into a menu at a specified location. The prototype for this function is

BOOL InsertMenu( nPosition, nFlags, nIDNewItem, lpszNewItem ); BOOL InsertMenu( nPosition, nFlags, nIDNewItem, * pBmp );

where
nPosition – Specifies the menu item before the new menu item is inserted.
nFlags – Specifies information about the state of the new menu item
nIDNewItem – Specifies either the command ID of the new menu item or, if nFlags is set to MF_POPUP, the menu handle (HMENU) of the pop-up menu.
lpszNewItem – Specifies the content of the new menu item.
pBmp – Points to a CBitmap object that will be used as the menu item.

Returns nonzero if the function is successful; otherwise 0.
For further reading
https://docs.microsoft.com/en-us/cpp/mfc/reference/cmenu-class?view=vs-2019#insertmenu


DeleteMenu

Deletes a menu item and the submenu associated with it, if any. The prototype of this function is

BOOL DeleteMenu( UINT nPosition, UINT nFlags );

Where
nPosition – Specifies the menu item that is to be deleted
nFlags – Is used to interpret nPosition

Return nonzero if the function is successful; otherwise 0

For further reading
https://docs.microsoft.com/en-us/cpp/mfc/reference/cmenu-class?view=vs-2019#deletemenu


RemoveMenu

Deletes a menu item

BOOL RemoveMenu( UINT nPosition, UINT nFlags );

where
nPosition – Specifies the menu item to be removed.
nFlags – Specifies how nPosition is interpreted
Return nonzero if the function is successful; otherwise 0.

The difference between RemoveMenu and DeleteMenu is that if the item being removed has a submenu, then deletemenu will remove the item and destroys the submenu, too. RemoveMenu removes the item but leaves the submenu extant in memory. The submenu can then be attached to another menu or destroyed later.

Before a menu is modified, the developer will need the CMenu pointer referencing the menu. MFC’s CWnd::GetMenu function returns a CMenu pointer for a window’s top-level menu or NULL if the window doesn’t have a top-level menu-

<code data-enlighter-language="c" class="EnlighterJSRAW">CMenu* pMenu = GetMenu();
if (pMenu != NULL)
{
    pMenu->DeleteMenu(1, MF_BYPOSITION);
}</code>

GetMenu

Before a menu can be modified programmatically, the application must first obtain a pointer to the window’s top-level menu. The CWnd::GetMenu() member function returns a pointer to the window’s menu.

The prototype for this function is

CMenu* GetMenu() const;

Returns a pointer to the window’s menu or NULL if the window does not have a menu.

For example:

CMenu* pMenu = GetMenu();

if (pMenu != NULL)
{
    pMenu->DeleteMenu(1, MF_BYPOSITION);
}

GetSubMenu

A menu bar typically contains one or more drop-down menus. These are represented by CMenu objects and can be accessed using the GetSubMenu() member function.

The prototype for this function is

CMenu* GetSubMenu(int nPos) const;

Where

  • nPos – Specifies the zero-based position of the submenu.

Returns a pointer to the requested submenu or NULL if the submenu does not exist.

For example, the following code obtains a pointer to the first menu on the menu bar:

CMenu* pMenu = GetMenu();

if (pMenu != NULL)
{
    CMenu* pFileMenu = pMenu->GetSubMenu(0);
}

The returned pointer can then be used to insert, delete, or modify the items contained within that submenu.


SetMenu

When a menu is created dynamically, it must be attached to a window before it becomes visible. The CWnd::SetMenu() member function associates a menu with a window.

The prototype for this function is

BOOL SetMenu(CMenu* pMenu);

Where

  • pMenu – Points to the menu that is to be attached to the window.

Returns nonzero if the function is successful; otherwise 0.

For example:

CMenu menu;
menu.CreateMenu();

// Add menu items.

SetMenu(&menu);

DrawMenuBar

After modifying or replacing a menu, the menu bar should be redrawn so that the changes become visible. This is accomplished using the CWnd::DrawMenuBar() member function.

The prototype for this function is

void DrawMenuBar();

The function redraws the menu bar for the specified window using the current menu.

For example:

CMenu* pMenu = GetMenu();

if (pMenu != NULL)
{
    pMenu->AppendMenu(MF_STRING, ID_NEWITEM, TEXT("New Item"));
    DrawMenuBar();
}

Calling DrawMenuBar() is particularly useful after adding, removing, or modifying menu items programmatically, ensuring that the changes are immediately reflected in the application’s user interface.


Updating Menu Items

ON_UPDATE_COMMAND_UI

The ON_UPDATE_COMMAND_UI message-map macro allows an application to update the appearance of menu items immediately before they are displayed. It is commonly used to enable or disable menu items, display check marks, or modify menu text based on the application’s current state.

The message-map entry has the form

ON_UPDATE_COMMAND_UI(id, memberFunction)

Where

  • id – Specifies the command identifier of the menu item.
  • memberFunction – Specifies the function that updates the menu item.

The corresponding handler has the prototype

afx_msg void OnUpdateCommand(CCmdUI* pCmdUI);

The CCmdUI object provides several useful member functions, including

  • Enable() – Enables or disables the menu item.
  • SetCheck() – Adds or removes a check mark.
  • SetText() – Changes the displayed text of the menu item.

This mechanism allows menu items to reflect the current state of the application automatically whenever the menu is displayed.

The ON_UPDATE_COMMAND_UI macro enables or disables a menu item, checks or unchecks it, or changes its appearance immediately before the menu is displayed.

ON_UPDATE_COMMAND_UI(ID_EDIT_COPY, OnUpdateCopy)

The corresponding handler is

void OnUpdateCopy(CCmdUI* pCmdUI);

where pCmdUI provides functions such as

pCmdUI->Enable(TRUE);
pCmdUI->SetCheck(TRUE);
pCmdUI->SetText(_T("New Text"));

Changes the command ID, text, or other characteristics of a menu item.

BOOL ModifyMenu( nPosition, nFlags, nIDNewItem, lpszNewItem ); BOOL ModifyMenu( nPosition, nFlags, nIDNewItem, pBmp );

NPosition – Specifies the menu item to be changed.
nFlags, nIDNewItem, lpszNewItem-see insert menu

For further reading
https://docs.microsoft.com/en-us/cpp/mfc/reference/cmenu-class?view=vs-2019#modifymen


The Popup or Context Menu

Popup or context menus are those which generally appear when the user right-clicks. This menu is often referred to as a context menu because the options in the menu relate to what was right-clicked. The x and y coordinates passed to TrackPopupMenu() are screen coordinates. If the mouse position is obtained from a client-area message such as WM_RBUTTONDOWN, convert the coordinates using ClientToScreen() before displaying the menu.The popup menu can be loaded from an existing resource or created dynamically with a call to the function CreatePopupMenu().

The cmenu member function TrackPopupMenu() displays a context menu. The function prototype is

BOOL TrackPopupMenu (UINT nFlags, int x, int y, CWnd* pWnd, LPCRECT lpRect = NULL)

Where
nFlags – Specifies screen-position and mouse-position flags.
Use one of the following flags to specify how the function positions the shortcut menu horizontally.
TPM_CENTERALIGN – Centers the shortcut menu horizontally relative to the coordinate specified by the x parameter.
TPM_LEFTALIGN – Positions the shortcut menu so its left side is aligned with the coordinate specified by the x parameter.
TPM_RIGHTALIGN – Positions the shortcut menu so its right side is aligned with the coordinate specified by the x parameter.
Use one of the following flags to specify how the function positions the shortcut menu vertically.
TPM_BOTTOMALIGN – Positions the shortcut menu so its bottom side is aligned with the coordinate specified by the y parameter.
TPM_TOPALIGN – Positions the shortcut menu so its top side is aligned with the coordinate specified by the y parameter.
TPM_VCENTERALIGN – Centers the shortcut menu vertically relative to the coordinate specified by the y parameter.
x – Specifies the horizontal position in screen coordinates of the pop-up menu.
y – Specifies the vertical position in screen coordinates of the top of the menu on the screen.
pWnd – Identifies the window that owns the pop-up menu.
lpRect – Ignored.

Returns the result of calling TrackPopupMenu

Example

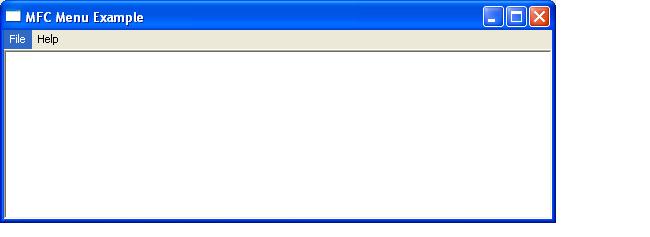
The short program below demonstrates a simple menu structure. Clicking file>new will produce a messagebox and file>exit will close the application. A right-click will produce a context menu containing the same menu items as the main menu.

Drawing Lines and Shapes

The CDC class provides the member functions used to perform graphics output in an MFC application. It specifies a Windows device context (DC) and provides functions for drawing lines, shapes, text, and images. This section introduces some of the most commonly used drawing functions. For a complete description of the CDC class, refer to the Microsoft documentation.

For a complete description of the CDC class, refer to the Microsoft MFC documentation.

A sample of the graphics object functions found in the CDC class is listed below

Displaying Pixels

Single pixels can be drawn on the screen using the member function SetPixel()

COLORREF SetPixel(int x,int y,COLORREF pColour); COLORREF SetPixel(POINT point,COLORREF pColor);


Where
x – Specifies the logical x-coordinate.
y – Specifies the logical y-coordinate.
pColor – specifies the colour used to paint the point.
point – specifies a single (x,y) coordinate.

Returns an RGB value for the colour that is actually painted. This value may be different from pColor if an approximation is used. If the function fails, the return value is -1.


MoveTo

The initial starting position for graphics output will be the screen coordinate position 0,0; however, this can be set by the application with a call to the member function MoveTo(). The prototype for the Moveto function is –

CPoint MoveTo(int x,int y); CPoint MoveTo(POINT point);


where
x – specifies the x-coordinate of the new position, in logical units.
y – specifies the y-coordinate of the new position, in logical units.
point – specifies the new position using either a point structure or a CPoint object.


Drawing Lines

LineTo draws a line from the current position to a specified position and moves the current position to the end of the line –

BOOL LineTo(int x, int y); BOOL LineTo(POINT point);


where
x – Specifies the logical x-coordinate of the new position.
y – Specifies the logical y-coordinate of the new position.
point – specifies a single (x,y) coordinate.

Returns non-zero if the function succeeds; otherwise 0.


PolylineTo

Connects a set of points with line segments

BOOL PolylineTo(const POINT* lpPoints,int nCount);

where
lpPoints – Points to an array of POINT data structures that contains the vertices of the line.
nCount – Specifies the number of points in the array.

Returns nonzero if the function is successful; otherwise 0.


Ellipse

The Ellipse member function draws an ellipse that fits within the specified bounding rectangle. If the bounding rectangle is square, the result is a circle.

BOOL Ellipse( int x1, int y1,int x2,int y2); BOOL Ellipse(LPCRECT lpRect);


Where
x1 – Specifies the x-coordinate of the upper-left corner of the ellipse’s bounding rectangle.
y1 – Specifies the y-coordinate of the upper-left corner of the ellipse’s bounding rectangle.
x2 – Specifies the x-coordinate of the lower-right corner of the ellipse’s bounding rectangle.
y2 – Specifies the y-coordinate of the lower-right corner of the ellipse’s bounding rectangle.
lpRect – Specifies the ellipse’s bounding rectangle.

Returns non-zero if the function is successful; otherwise 0.


Chord

A chord is the region bounded by an elliptical arc and the straight line joining the arc’s start and end points. The Chord member function draws a line segment connecting two points on a curve

BOOL Chord( int x1,int y1,int x2,int y2,int x3, int y3, int x4,int y4); BOOL Chord(LPCRECT lpRect,POINT ptStart,POINT ptEnd);

where
x1 – Specifies the x-coordinate of the upper-left corner of the chord’s bounding rectangle.
y1 – Specifies the y-coordinate of the upper-left corner of the chord’s bounding rectangle.
x2 – Specifies the x-coordinate of the lower-right corner of the chord’s bounding rectangle.
y2 – Specifies the y-coordinate of the lower-right corner of the chord’s bounding rectangle.
x3 – Specifies the x-coordinate of the point that defines the chord’s starting point.
y3 – Specifies the y-coordinate of the point that defines the chord’s starting point.
x4 – Specifies the x-coordinate of the point that defines the chord’s endpoint.
y4 – Specifies the y-coordinate of the point that defines the chord’s endpoint.
lpRect – Specifies the bounding rectangle (in logical units).
ptStart – Specifies the x- and y-coordinates of the point that defines the chord’s starting point. This point does not have to lie exactly on the chord. .
ptEnd – Specifies the x- and y-coordinates of the point that defines the chord’s ending point (in logical units). This point does not have to lie exactly on the chord.

Returns non-zero if the function is successful; otherwise 0.


Pie

A pie is the region bounded by an elliptical arc and two lines extending from the centre of the ellipse to the arc’s start and end points. The Pie member function draws a pie-shaped wedge by drawing an elliptical arc whose center and two endpoints are joined by lines.

BOOL Pie( int x1, int y1,int x2, int y2,int x3, int y3,int x4, int y4); BOOL Pie(LPCRECT lpRect,POINT ptStart,POINT ptEnd);


Where
x1 Specifies the x-coordinate of the upper-left corner of the bounding rectangle.
y1 Specifies the y-coordinate of the upper-left corner of the bounding rectangle.
x2 Specifies the x-coordinate of the lower-right corner of the bounding rectangle.
y2 Specifies the y-coordinate of the lower-right corner of the bounding rectangle.
x3 Specifies the x-coordinate of the arc’s starting point.
y3 Specifies the y-coordinate of the arc’s starting point.
x4 Specifies the x-coordinate of the arc’s endpoint (in logical units). This point does not have to lie exactly on the arc.
y4 Specifies the y-coordinate of the arc’s endpoint.
lpRect Specifies the bounding rectangle.
ptStart Specifies the starting point of the arc.
ptEnd Specifies the endpoint of the arc.

Returns non-zero if the function is successful; otherwise 0.


Polygon

The Polygon member function connects a sequence of points to form a closed polygon.

BOOL Polygon(LPPOINT lpPoints, int nCount);


Where
lpPoints – Points to an array of points that specifies the vertices of the polygon. Each point in the array is a POINT structure or a CPoint object.
nCount – Specifies the number of vertices in the array.

Returns non-zero if the function is successful; otherwise 0.


Rectangle

Draws a rectangle.

BOOL Rectangle(int x1,int y1,int x2,int y2); BOOL Rectangle(LPCRECT lpRect);

where
x1 Specifies the x-coordinate of the upper-left corner of the rectangle.
y1 Specifies the y-coordinate of the upper-left corner of the rectangle.
x2 Specifies the x-coordinate of the lower-right corner of the rectangle.
y2 Specifies the y-coordinate of the lower-right corner of the rectangle.
lpRect Specifies the rectangle in logical units. You can either pass a CRect object or a pointer to a RECT structure for this parameter.

Returns non-zero if the function is successful; otherwise 0.


RoundRect

The member function RoundRect draws a rectangle with rounded corners

BOOL RoundRect( int x1, int y1,int x2,int y2, int x3,int y3); BOOL RoundRect(LPCRECT lpRect, POINT point);

where
x1 Specifies the x-coordinate of the upper-left corner of the rectangle.
y1 Specifies the y-coordinate of the upper-left corner of the rectangle.
x2 Specifies the x-coordinate of the lower-right corner of the rectangle.
y2 Specifies the y-coordinate of the lower-right corner of the rectangle.
x3 Specifies the width of the ellipse used to draw the rounded corners.
y3 Specifies the height of the ellipse used to draw the rounded corners.

lpRect Specifies the bounding rectangle in logical units. You can either pass a CRect object or a pointer to a RECT structure for this parameter.
point – The x-coordinate of a point specifies the width of the ellipse to draw the rounded corners. The y-coordinate of a point specifies the height of the ellipse to draw the rounded corners. You can pass either a POINT structure or a CPoint object for this parameter.

Returns nonzero if the function is successful; otherwise 0.


Polyline

The Polyline member function draws a sequence of connected line segments.

BOOL Polyline(const POINT* lpPoints, int nCount);

Where

  • lpPoints – Points to an array of POINT structures or CPoint objects defining the vertices.
  • nCount – Specifies the number of points in the array.

Returns non-zero if the function is successful; otherwise 0.

Unlike Polygon(), Polyline() does not close the figure by joining the last point to the first.


FillSolidRect

The FillSolidRect member function fills a rectangle using a solid colour.

void FillSolidRect(int x,int y,int cx,int cy,COLORREF clr); void FillSolidRect(LPCRECT lpRect,COLORREF clr);

Where

  • x – Specifies the x-coordinate of the upper-left corner.
  • y – Specifies the y-coordinate of the upper-left corner.
  • cx – Specifies the width of the rectangle.
  • cy – Specifies the height of the rectangle.
  • lpRect – Specifies the rectangle to fill.
  • clr – Specifies the fill colour.

This function is commonly used for painting backgrounds and coloured panels.


FillRect

The FillRect member function fills a rectangle using the currently selected brush.

Bint FillRect(LPCRECT lpRect,CBrush* pBrush);

Where

  • lpRect – Specifies the rectangle to fill.
  • pBrush – Points to the brush used to paint the rectangle.

Returns a non-zero value if the function is successful; otherwise 0.


DrawFocusRect

The DrawFocusRect member function draws a focus rectangle using an XOR operation.

void DrawFocusRect(LPCRECT lpRect);

Where

  • lpRect – Specifies the rectangle to draw.

Calling DrawFocusRect() a second time with the same rectangle removes it. This function is commonly used to indicate keyboard focus or to implement drag-selection rectangles.


InvertRect

The InvertRect member function inverts the colours within a rectangle.

void InvertRect(LPCRECT lpRect);

Where

  • lpRect – Specifies the rectangle whose colours are to be inverted.

InvertRect() is often used to highlight a selected area without changing the underlying image.


FloodFill

The FloodFill member function fills an enclosed area beginning at a specified point.

BOOL FloodFill(int x,int y,COLORREF clr);

Where

  • x – Specifies the x-coordinate of the starting point.
  • y – Specifies the y-coordinate of the starting point.
  • clr – Specifies the boundary colour.

Returns non-zero if the function is successful; otherwise 0.


ExtFloodFill

The ExtFloodFill member function fills an enclosed area using either a boundary colour or a surface colour.

BOOL ExtFloodFill(int x,int y,COLORREF clr,UINT nFillType);

Where

  • x – Specifies the x-coordinate of the starting point.
  • y – Specifies the y-coordinate of the starting point.
  • clr – Specifies either the boundary colour or the colour to replace.
  • nFillType – Specifies the fill mode (FLOODFILLBORDER or FLOODFILLSURFACE).

Returns non-zero if the function is successful; otherwise 0.

For full details of Windows drawing capabilities use the following
https://docs.microsoft.com/en-us/cpp/mfc/reference/cdc-class?view=vs-2019

Example

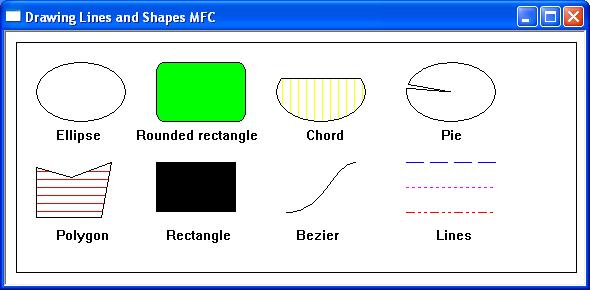
The following short program illustrates some of the windows line and shape drawing capabilities

Dealing with Keyboard Input

Keyboard input is delivered to an application’s window procedure in the form of Windows messages. Whenever a key is pressed or released, Windows posts one or more keyboard messages to the message queue of the window that currently has the keyboard focus. Since most applications contain several windows, only the window with the keyboard focus receives these messages.

Pressing keys on the keyboard will generate both a keystroke and a character. Keystrokes represent the physical keypress and characters represent the display symbol or glyphs generated as a result of the keypress.

When a key is pressed or released, Windows places a WM_KEYDOWN or WM_KEYUP message in the application’s message queue. These keystroke messages identify the key using a virtual-key code. A virtual-key code is a device-independent integer value that uniquely identifies a key on the keyboard. The corresponding MFC message-map macros are ON_WM_KEYDOWN() and ON_WM_KEYUP(). The prototype for the message handler is:

afx_msg void OnMsgName(UINT nChar, UINT nRepCnt, UINT nFlags);

where
nChar – the virtual-key code of the key that was pressed or released.
nRepCnt – the repeat count, indicating the number of times the keystroke has been automatically repeated while the key remains pressed.
nFlags – contains additional information about the keystroke, including the scan code, extended-key flag, context code, previous key state, and transition state.

In addition to producing keystrokes, character messages are also produced as a result of translating keystroke messages into character codes. The most commonly used character message is WM_CHAR. A WM_CHAR message includes a character code that maps directly to a symbol in the current character set. The ON_WM_CHAR macro entry in a class’s message map routes WM_CHAR messages to the member function OnChar(). The prototype is as follows:

afx_msg void OnMsgName(UINT nChar,UINT nRepCnt,UINT nFlags);

where nChar holds the character code and nRepCnt and nFlags have the same meanings as keystroke messages.

Some additional keyboard messages

SYSKEY messages

WM_SYSKEYDOWN and WM_SYSKEYUP are generated when the user presses the Alt key or presses another key while the Alt key is held down. They are also generated when the F10 key is pressed because Windows reserves this key for activating the menu bar.

If other keys are pressed while the Alt key is held down Windows will generate a WM_SYSKEYDOWN and WM_SYSKEYUP messages instead of WM_KEYDOWN and WM_KEYUP messages.

The window that receives the message can distinguish between these two contexts by checking the context code in the lParam parameter.

The corresponding message-map macros are

ON_WM_KEYDOWN()
ON_WM_KEYUP()
ON_WM_SYSKEYDOWN()
ON_WM_SYSKEYUP()

Handling WM_SYSKEYDOWN and WM_SYSKEYUP messages is generally best left to the system since if these messages don’t find their way to ::DefWindowProc and get returned to Windows then system keyboard commands such as Alt-Tab will stop working.

Dead keys

A dead key is a modifier key that does not generate a character but modifies the character generated by the key pressed immediately after it. Dead keys are typically used to attach a specific diacritic to a base letter. Examples of dead keys include the acute (´), grave (`), circumflex (^), and tilde (~) accent keys found on many European keyboard layouts.

To process dead-key messages in an MFC application will need an ON_WM_DEADCHAR or ON_WM_SYSDEADCHAR entry in the message map in addition to supplying handling functions named OnDeadChar() and OnSysDeadChar().

Virtual key codes

Windows defines special constants for each key the user can press. These constants, known as virtual key codes, provide hardware and language-independent methods of identifying keyboard keys. Microsoft provides a complete list of virtual-key codes in the Windows API documentation.

Retrieving a key state

The ::GetKeyState() API function retrieves the status of a specified virtual key. The status specifies whether the key is up, down, or toggled. Since information about the current states of keys such as Shift and Ctrl keys is not included in keyboard messages, the GetKeyState API function allows the developer to determine these key states before deciding on a course of action. The syntax for this function is –

SHORT GetKeyState(int vKey);

The return value is:

High-order bit set → key is currently down.
Low-order bit set → key is toggled (Caps Lock, Num Lock, Scroll Lock).

Retrieving the Asynchronous Key State

The ::GetAsyncKeyState() API function retrieves the current state of a specified virtual key independently of the application’s message queue. Unlike GetKeyState(), which reports the keyboard state associated with the current message being processed, GetAsyncKeyState() returns the real-time physical state of the key at the instant the function is called. This makes it particularly useful in applications such as games, drawing programs, and other real-time software that continuously polls the keyboard rather than relying solely on keyboard messages.

The syntax for the function is:

SHORT GetAsyncKeyState(int vKey);

where vKey specifies one of the Windows virtual-key codes.

The return value is a 16-bit value. If the most significant bit is set, the key is currently pressed. If the least significant bit is set, the key has been pressed since the previous call to GetAsyncKeyState(). Because other applications may also call this function, the least significant bit should not be relied upon in modern versions of Windows. In most applications, only the most significant bit is tested.

For example, the following code determines whether the Shift key is currently being held down:

if (GetAsyncKeyState(VK_SHIFT) & 0x8000)
{
    // Shift key is currently pressed.
}

Example

The following code segment illustrates key-down and char-character message handling by displaying the output of the keystroke and character values when a key is pressed.

Working with the Mouse

Windows supports mice with multiple buttons and a scroll wheel. Early versions of Windows were designed around the assumption of a three-button mouse (left, right, and middle buttons) plus an optional wheel. Modern versions of Windows (Windows XP onwards, and especially Windows 7, 10 and 11) support additional mouse buttons. Mouse messages are generated whenever the user moves the mouse, clicks a mouse button, or rotates the scroll wheel within either the client area or the non-client area of a window. The non-client area consists of the window border, title bar, menu bar, scroll bars, and the minimise, maximise, and close buttons.

Client Area Mouse Messages

The table below lists the most commonly used client-area mouse messages together with their MFC message-map macros and handler functions.

DescriptionMessage map macroHandling function
Left mouse button pressed.ON_WM_LBUTTONDOWNOnLButtonDown
Left mouse button released.ON_WM_LBUTTONUPOnLButtonUp
Left mouse button double-clicked.ON_WM_LBUTTONDBLCLKOnLButtonDblClk
Middle mouse button pressed.ON_WM_MBUTTONDOWNOnMButtonDown
Middle mouse button released.ON_WM_MBUTTONUPOnMButtonUp
Middle mouse button double-clicked.ON_WM_MBUTTONDBLCLKOnMButtonDblClk
Right mouse button pressed.ON_WM_RBUTTONDOWNOnRButtonDown
Right mouse button released.ON_WM_RBUTTONUPOnRButtonUp
Right mouse button double-clicked.ON_WM_RBUTTONDBLCLKOnRButtonDblClk
Cursor moved over client area.ON_WM_MOUSEMOVEOnMouseMove

The prototype for each client-area message handler is:

afx_msg void OnMsgName (UINT nFlags, CPoint point)

Where
point – contains the cursor location reported in device coordinates relative to the upper left corner of the window’s client area.
nFlags – contains additional information about the mouse state and Shift and Ctrl as detailed below.

MK_LBUTTON – The left mouse button is pressed.
MK_MBUTTON – The middle mouse button is pressed.
MK_RBUTTON – The right mouse button is pressed.
MK_CONTROL – The Ctrl key is pressed.
MK_SHIFT – The Shift key is pressed.

Nonclient-Area Mouse Messages

A non-client-area message is generated whenever the mouse is moved or a mouse button is pressed over a window’s non-client area.

MessageMessage-Map MacroHandling Function
WM_NCLBUTTONDOWNON_WM_NCLBUTTONDOWNOnNcLButtonDown
WM_NCLBUTTONUPON_WM_NCLBUTTONUPOnNcLButtonUp
WM_NCLBUTTONDBLCLKON_WM_NCLBUTTONDBLCLKOnNcLButtonDblClk
WM_NCMBUTTONDOWNON_WM_NCMBUTTONDOWNOnNcMButtonDown
WM_NCMBUTTONUPON_WM_NCMBUTTONUPOnNcMButtonUp
WM_NCMBUTTONDBLCLKON_WM_NCMBUTTONDBLCLKOnNcMButtonDblClk
WM_NCRBUTTONDOWNON_WM_NCRBUTTONDOWNOnNcRButtonDown
WM_NCRBUTTONUPON_WM_NCRBUTTONUPOnNcRButtonUp
WM_NCRBUTTONDBLCLKON_WM_NCRBUTTONDBLCLKOnNcRButtonDblClk
WM_NCMOUSEMOVEON_WM_NCMOUSEMOVEOnNcMouseMove

The message map handler function will be of the following format

afx_msg void OnMsgName (UINT nHitTest, CPoint point)

where
nHitTest – contains a hit-test code that identifies where in the window’s nonclient area the event occurred. A selection of these hit-test codes is shown in the list below.

ValueCorresponding Location
HTCAPTION The title bar
HTCLOSE The close button
HTGROWBOX The restore button (same as HTSIZE)
HTHSCROLL The window’s horizontal scroll bar
HTMENU The menu bar
HTREDUCE The minimize button
HTSIZE The restore button (same as HTGROWBOX)
HTSYSMENU The system menu box
HTVSCROLL The window’s vertical scroll bar
HTZOOM The maximize button

point – specifies the screen coordinates at which the event occurred. Unlike client-area mouse messages, the coordinates are expressed in screen coordinates rather than client coordinates. They can be converted using CWnd::ScreenToClient().

Miscellaneous Mouse Messages

WM_NCHITTEST

Before a window receives a client-area or nonclient-area mouse message, it receives a WM_NCHITTEST message accompanied by the cursor’s screen coordinates. Windows uses this message to determine whether to send a client-area or nonclient-area mouse message. For a complete description of the message parameters, consult the Microsoft documentation for WM_NCHITTEST.

The Mouse Wheel

The WM_MOUSEWHEEL message is sent when the mouse wheel is rotated.
MFC’s ON_WM_MOUSEWHEEL macro maps WM_MOUSEWHEEL messages to the message handler OnMouseWheel. The prototype of OnMouseWheel is:

BOOL OnMouseWheel (UINT nFlags, short zDelta, CPoint point)

Where
The nFlags and point parameters are identical to those passed to OnLButtonDown.zDelta is the distance the wheel was rotated. zDelta is expressed in multiples (or fractions) of WHEEL_DELTA, whose value is 120.. A value less than zero indicates rotating while a value greater than zero indicates rotating forward (away from the user).

Double Clicks

By default, Windows does not generate double-click messages. To receive them, the window class must be registered with the CS_DBLCLKS style.To register a double click, a window must be set up to be notified of a double click event by including the WNDCLASS style CS_DBLCLKS during Windows registration. This is set by default in a frame windows declaration. The MFC Message-Map Macro and associated Handling Function for dealing with a double click are

ON_WM_LBUTTONDBLCLK – OnLButtonDblClk(UINT, CPoint)
ON_WM_RBUTTONDBLCLK – OnRButtonDblClk(UINT, CPoint)
ON_WM_MBUTTONDBLCLK – OnMButtonDblClk(UINT, CPoint)

Capturing the Mouse

A window procedure normally receives mouse messages only when the mouse cursor is positioned over the client or nonclient area of the window however a program might need to receive mouse messages when the mouse is outside the window. For example, if a mouse button is clicked inside a window but the mouse moves outside the window’s client area before releasing that button then the window will not receive the button-up event. To remedy this problem, Windows allows the application to ‘capture’ the mouse and continue to receive mouse messages when a cursor moves outside the application window. Windows will then continue to receive messages until the button is released or the capture is cancelled. The mouse is captured with CWnd member function SetCapture() and released with CWnd member function ReleaseCapture(). These functions are normally executed in the button-down and button-up handlers

The Hourglass Cursor

When an application undertakes a lengthy processing task the usual procedure is to display an hourglass to indicate that the application is “busy.” The CWaitCursor class allows any application to display a wait cursor. To display a WaitCursor create a CWaitCursor object variable before the code that performs the lengthy operation, the object’s constructor will automatically cause the wait cursor to be displayed. When the object goes out of scope its destructor will set the cursor to the previous cursor.

void LengthyFunction( ) {   CWaitCursor wait; // display wait cursor   //lengthy process } // wait cursor removed when function goes out of scope

Changing the Mouse Icon

The Win32 API function SetCursor() changes the shape of the mouse cursor. The cursor can be created with CreateCursor() or loaded with LoadCursor() or LoadImage(). In MFC applications, cursor changes are typically performed in response to the WM_SETCURSOR message.

HCURSOR SetCursor(HCURSOR hCursor);

Where hCursor is a handle to the cursor. The cursor can be created by the CreateCursor() function or loaded by the LoadCursor() or LoadImage() function. If this parameter is NULL, the cursor is removed from the screen.
The return value is the handle to the previous cursor or NULL if there was no previous cursor.

For further information about setting the cursor icon go to the following link
https://support.microsoft.com/en-gb/help/131991/how-to-change-the-mouse-pointer-for-a-window-in-mfc-by-using-visual-c

Determining the Mouse Position

An application often needs to determine the current position of the mouse cursor independently of mouse messages. For example, a program may need to display a context menu at the current cursor position, track the cursor while performing a background operation, or determine the cursor position when a timer expires.

The Win32 API function GetCursorPos() retrieves the current position of the mouse cursor in screen coordinates. Its prototype is:

BOOL GetCursorPos(LPPOINT lpPoint);)

where lpPoint points to a POINT structure that receives the screen coordinates of the cursor.

Example

POINT pt;

if (GetCursorPos(&pt))
{
    printf("Screen Coordinates: (%ld, %ld)\n", pt.x, pt.y);
}

In MFC applications, the POINT structure is equivalent to the CPoint class:

CPoint pt;

if (GetCursorPos(&pt))
{
    TRACE("Screen Coordinates: (%d, %d)\n", pt.x, pt.y);
}

Many applications require the cursor position relative to a window’s client area rather than the desktop. The ScreenToClient() member function converts screen coordinates into client coordinates.

CPoint pt;

GetCursorPos(&pt);
ScreenToClient(&pt);

TRACE("Client Coordinates: (%d, %d)\n", pt.x, pt.y);

Conversely, the ClientToScreen() member function converts client coordinates into screen coordinates.

CPoint pt(20, 30);

ClientToScreen(&pt);

// pt now contains the corresponding screen coordinates.

When handling mouse messages such as WM_MOUSEMOVE, WM_LBUTTONDOWN, or WM_RBUTTONDOWN, it is unnecessary to call GetCursorPos(), because the cursor position is already supplied in the handler’s CPoint parameter. GetCursorPos() is primarily used when the application needs to determine the cursor position outside the context of a mouse message.

Example

The following short program demonstrates how Windows handles messages from both the client and non-client areas of the screen, together with the ALT and CTRL keys. Output describing the area clicked and the coordinate of the area clicked is displayed in the main window.

Dealing with Text Output

Displaying Text

The two most commonly used functions for displaying text in an MFC application are the CDC member functions TextOut() and DrawText(). Both functions display text using the font currently selected into the device context. If no custom font has been selected, the system default font is used.

TextOut() is typically used to display a single line of text at a specified position, while DrawText() provides greater flexibility by allowing text to be aligned, wrapped, or formatted within a rectangular region.

The prototypes for these member functions are:

virtual BOOL TextOut(int x,int y,LPCTSTR lpszString,int nCount); BOOL TextOut(int x,int y,const CString& str);

Where
x – Specifies the vertical position of the starting point of the text.
y – Specifies the horizontal position of the starting point of the text.
lpszString – Points to the character string to be drawn.
nCount – Specifies the number of characters in the string.
str – A CString object that contains the characters to be drawn.

Returns non-zero if the function is successful; otherwise zero.

virtual int DrawText(LPCTSTR lpszString,int nCount,LPRECT lpRect,UINT nFormat); int DrawText(const CString& str, LPRECT lpRect,UINT nFormat);

where
pszString – Points to the string to be drawn.
nCount – Specifies the number of chars in the string.
lpRect – Points to a RECT structure or CRect object that contains the text to be formatted.
str – A CString object that contains the specified characters to be drawn.
nFormat – Specifies the method of formatting the text.

The function returns the height of the text if the function is successful.

Fonts

In MFC, the CFont class is used to create and manipulate fonts. By default, the CDC text output class can draw text using a pre-selected system. MFC supports 7 built-in fonts. These are

ANSI_FIXED_FONT
ANSI_VAR_FONT
DEVICE_DEFAULT_FONT
DEFAULT_GUI FONT
OEM_FIXED_FONT
SYSTEM_FONT
SYSTEM_FIXED_FONT

To select one of these stock fonts into the current device context first create a CFont object and then call the object member function CreateStockObject() using one of the custom font names above. The CFont object can then be selected into the current device context by calling the SelectObject() member function as below –

CFont newfont; Newfont.CreateStockObject(ANSI_FIXED_FONT); paintDC.SelectObject(newfont);

Custom Fonts

The CFont object class supplies 4 member functions for creating and initialising a font before use: CreateFont()CreateFontIndirect()CreatePointFont(), and CreatePointFontIndirect(). Use CreateFont or CreateFontIndirect to specify the font size in pixels, and CreatePointFont and CreatePointFontIndirect to specify the font size in points. The syntax for the CreateFont member function is

BOOL CreateFont( int nHeight, int nWidth,int nEscapement, int nOrientation,int nWeight,BYTE bItalic, BYTE bUnderline,BYTE bStrikeOut,BYTE nCharSet,BYTE nOutPrecision,BYTE nClipPrecision, BYTE nQuality,BYTE nPitchAndFamily, LPCTSTR lpszFacename);

where
nHeight – The height, in logical units, of the font.
nWidth – The average, in logical units, of the font.
nEscapement – Angle of the escapement.
nOrientation – Base-line orientation angle
nWeight – Font weight ( 0 – 1000)
bItalic – Specifies an italic font.
bUnderline – Specifies an underlined font.
bStrikeOut – A strikeout font if set to TRUE.
nCharSet – Character set identifier
nOutPrecision – Defines how closely the output must match the requested font attributes
nClipPrecision – Defines how to clip characters partially outside the clipping region.
nQuality – Defines how carefully GDI must attempt to match the logical font attributes to those of an actual physical font.
nPitchAndFamily -The two low-order bits specify the pitch of the font
pszFaceName – Is a pointer to a null-terminated string that specifies the typeface name of the font

If the function succeeds, the return value is a handle to a logical font. If the function fails, the return value is NULL.

For further detailed reading of the CreateFont member function
https://docs.microsoft.com/en-us/cpp/mfc/reference/cfont-class?view=vs-2019#createfont

For further detailed reading on the CFont MFC class
https://docs.microsoft.com/en-us/cpp/mfc/reference/cfont-class?view=vs-2019

Deleting GDI Objects

CFont objects, like other objects derived from GDI object classes, use system resources and consume memory. These resources should be released when they are no longer needed to prevent memory leaks.

If a CFont object is created as a local stack object, it is automatically destroyed when it goes out of scope. The destructor of the object releases the associated GDI resources.

If a CFont object is created dynamically on the heap using new, it must be explicitly released. The program should call DeleteObject() before deleting the object.

Setting Text Colour.

The cdc member function SetTextColor() sets the text colour to the specified colour. The syntax for this function is –

settextcolor(colorref color);

Where color specifies the colour of the text as an RGB colour value.
Returns an RGB value for the previous text colour.

Setting the Text Background Colour

The cdc member function SetTextColor sets the text background to the specified colour. The syntax for this function is

virtual COLORREF SetBkColor(COLORREF colour);

Where colour specifies the new background colour.
Returns the previous background colour as an RGB colour value. If an error occurs, the return value is 0x80000000.

Setting the Text Background Display Mode

The background mode defines whether the system removes existing background colours before drawing text. To set the way text is displayed against its background use the cdc function SetBkMode(). The device context text background can be set to opaque or transparent. The prototype for this function is

SetBkMode(int nBkMode)

where
nBKMode – Specifies the mode to be set. This parameter can be either of the following values:

  • opaque – Background is filled with the current background colour before the text, hatched brush, or pen is drawn. This is the default background mode.
  • transparent – Background is not changed before drawing.

Returns the previous background mode.

Textmetric

When an application displays multiple lines of text, it must know the amount of horizontal space occupied by each line so that subsequent text can be positioned correctly. Windows does not automatically maintain a record of the current text output position, so the application must calculate the size of the text itself.

This is particularly important when using proportional fonts (non-monospaced typefaces), where each character can have a different width. For example, the letter “i” takes less horizontal space than the letter “W”, meaning the length of a string cannot be calculated simply by counting characters.

MFC provides the CDC member function GetTextExtent() to determine the size of a text string using the currently selected font in the device context.

BOOL GetTextMetrics(LPTEXTMETRIC lpMetrics) const;

Where lpMetrics points to the TEXTMETRIC structure that receives the metrics.

For detailed reading on the textmetric structure use the following resource
https://docs.microsoft.com/en-us/windows/win32/api/wingdi/ns-wingdi-textmetricw

Character Spacing

When an application displays consecutive lines of text, it needs to know the length of each string so that the next line can be positioned correctly. This is necessary because Windows does not automatically keep track of the current text output position.

The amount of horizontal space occupied by a string depends on the font being used. In a monospaced font, every character has the same width, making spacing predictable. However, in a non-monospaced (proportional) font, characters have different widths, so the length of a string cannot be determined simply by counting characters.

To solve this problem, MFC provides the CDC member function GetTextExtent(). This function calculates the size of a text string using the font currently selected into the device context.

The syntax of this function is

CSize GetTextEntent( LPCTSTR lpszString, int nCount ) const; CSize GetTextExtent( const CString& str ) const;

Where
lpszString – Points to a string of characters.
nCount – Specifies the number of characters in the string.
str – A CString object that contains the specified characters.

Returns the dimensions of the string in a CSize object.

Example

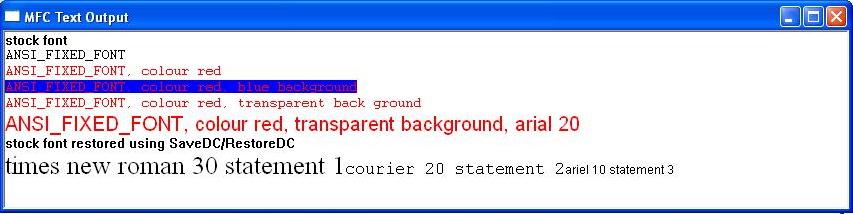
The following short program demonstrates the various text manipulation functions.

Download Code

Working with Graphics


In MFC, the CDC class provides a C++ wrapper around the Windows device context (DC) and the associated Graphics Device Interface (GDI) functions used for drawing on display devices. The Windows graphics system uses graphical objects such as pens, brushes, fonts, bitmaps, and palettes to control the appearance of graphical output.

A pen defines the colour, width and line style used to draw lines, curves and the outlines of shapes. A brush determines how the interior of closed shapes, such as rectangles and circles, is filled. Fonts specify the appearance of text, while bitmaps and palettes are used for displaying images and managing colours.

When Windows creates a device context, it automatically contains a default set of graphical objects known as stock objects. These include a limited selection of pens, brushes, fonts and palettes that applications can use without creating their own graphics objects.

If an application requires drawing attributes that differ from the default settings, it must first create the required graphical object and then select it into the device context using one of the SelectObject() functions. Once selected, the new object remains active until another object of the same type is selected into the device context. Changing the selected pen, brush or font affects only subsequent drawing operations; graphics that have already been drawn on the display remain unchanged.

For efficient resource management, any application-created graphical object should be deselected from the device context before it is destroyed, and the original object restored. This ensures that Windows resources are released correctly and helps prevent resource leaks.

Creating Custom Pens

The default pen draws solid black lines that are 1 pixel wide. The CDC member function CreatePen() deals with creating custom pens. The prototype of this function is

BOOL CreatePen( int nPenStyle, int nWidth, COLORREF crColor );

Were.
nPenStyle -can be any one of the following values: PS_SOLID, PS_DOT, PS_DASHDOT, PS_DASHDOTDOT, PS_NULL, PS_INSIDEFRAME,
nWidth – Specifies the width of the pen
crColor – Contains an RGB colour for the pen.

If the function succeeds, the return value is a handle that identifies a logical pen. If the function fails, the return value is NULL.

For further reading
https://docs.microsoft.com/en-us/windows/win32/api/wingdi/nf-wingdicreatepen

Create Custom Brushes

Brushes are used to fill in any closed objects. They have colour, style, and can be bitmaps. The CBrush class encapsulates GDI brushes and supplies various member functions to deal with the creation of custom brushes. The prototype for the CreateSolidBrush() function is:

BOOL CreateSolidBrush(COLORREF crColor);

where
crColor is a COLORREF structure that specifies the RGB colour of the brush. Return Nonzero if successful; otherwise 0.

For further reading on brush creation
https://docs.microsoft.com/en-us/cpp/mfc/reference/cbrush-class?view=vs-2019

Selecting Objects

Before any graphics object can be used it must be ‘selected’ into the current device context (DC) using the CDC member function SelectObject(). The new object will then replace the previous graphic object of the same type. The prototype of the SelectObject function for both a Pen() and a Brush() is:

CPen* SelectObject(CPen* pPen); CBrush* SelectObject(CBrush* pBrush);

Where
pPen – A pointer to a CPen object to be selected.
pBrush – A pointer to a CBrush object to be selected.

SelectObject will return a pointer to the previous graphics objects which may be useful should the application need to use the previous selection

For further reading
https://docs.microsoft.com/en-us/cpp/mfc/reference/cdc-class?view=vs-2019#selectobject

Using Stock Objects

The CDC member function SelectStockObject() retrieves a handle to a stock object. The prototype of this function is:

virtual CGdiObject* SelectStockObject(int nIndex);

Where the parameter nIndex can be one of the following values: BLACK_BRUSH, DKGRAY_BRUSH ,DC_BRUSH ,GRAY_BRUSH ,HOLLOW_BRUSH ,LTGRAY_BRUSH ,NULL_BRUSH ,WHITE_BRUSH ,BLACK_PEN ,DC_PEN ,NULL_PEN ,WHITE_PEN, ANSI_FIXED_FONT ,ANSI_VAR_FONT ,DEVICE_DEFAULT_FONT ,DEFAULT_GUI_FONT ,OEM_FIXED_FONT ,SYSTEM_FONT ,SYSTEM_FIXED_FONT , DEFAULT_PALETTE

If the function succeeds, the return value is a handle to the requested logical object. If the function fails, the return value is NULL

To select a stock object such as BLACK_PEN into the current device context

SelectObject(GetStockObject(BLACK_PEN));

Since stock objects are pre-created system resources there is no need to delete the object handle once they are no longer required.

For further reading on stock objects
https://docs.microsoft.com/en-us/windows/win32/api/wingdi/nf-wingdi-getstockobject

SaveDC and RestoreDC.

SaveDC() and RestoreDC() allow an application to save and restore the complete state of a device context. Each time an application requests a device context, its attributes are reset to the Windows defaults, meaning any custom pens, brushes, fonts, colours, clipping regions or mapping modes previously selected are lost.

To avoid repeatedly reinitialising the device context, the current state can be saved using SaveDC() before making changes and later restored using RestoreDC(). This is particularly useful when temporarily changing drawing attributes, as it allows the original settings to be reinstated with a single function call.

The prototypes of these member functions are:

int SaveDC();

BOOL RestoreDC(int nSavedDC);

Where:

  • SaveDC() saves the current state of the device context and returns an integer identifying the saved state.
  • RestoreDC(int nSavedDC) restores the device context to the state identified by nSavedDC.

Deleting GDI Objects

Custom pens, brushes and other objects created from GDI classes consume system resources. It is therefore important that they are deleted when they are no longer required.

If a GDI object is created on the stack, it is automatically destroyed when it goes out of scope, so no explicit deletion is necessary. However, if a GDI object is created on the heap using new, it must be explicitly deleted by calling the object’s DeleteObject() member function before deleting the object itself.

Objects created using CreateStockObject() represent Windows stock objects and must not be deleted, as they are owned and managed by the operating system.

Failure to delete dynamically created GDI objects results in a resource leak (often referred to as a memory or GDI leak), gradually reducing the number of GDI resources available to the application. Excessive leaks can eventually prevent the application from creating new pens, brushes, fonts or other graphical objects, leading to drawing errors or application failure.

Dealing with Colour Values

The Windows graphics system uses the RGB (Red, Green, Blue) colour model to specify colours. Every colour is defined by three components: red, green, and blue, each with an intensity value ranging from 0 to 255, where 0 represents no intensity and 255 represents maximum intensity. By combining different intensities of these three primary colours, over 16 million different colours can be produced.

Windows stores colours using the COLORREF data type, which is a 32-bit value containing the RGB colour information. Rather than specifying the individual colour components separately, the Windows GDI provides macros for creating and extracting COLORREF values.

//converts rgb to colourref value COLORREF RGB(BYTE byRed, BYTE byGreen, BYTE byBlue); //converts colourref value to RGB equivalent int iRed= GetRValue(COLORREF rgb); int iGreen =GetGValue(COLORREF rgb); int iBlue =BYTE GetBValue(COLORREF rgb);

A full description of all the CDC member functions covering graphics output can be found at the following-
https://docs.microsoft.com/en-us/cpp/mfc/reference/cdc-class?view=vs-2019

Device Context

Windows Painting and Device Contexts

In Windows, the Graphics Device Interface (GDI) is responsible for displaying graphics and formatted text on output devices such as the screen and printer. To draw on a device, an application uses a device context (DC), which is a Windows data structure containing information about the drawing attributes and capabilities of the output device. Writing text and drawing graphics on a window is known as painting.

System Generated Repaint Requests

Windows does not maintain a permanent copy of an application’s client area. If part of a window is covered, resized, minimised and restored, or otherwise becomes invalid, Windows marks that region as an invalid area and sends the application a WM_PAINT message. Windows keeps track of the size and coordinates of this invalid region for each window.

Before an application can ‘repaint’ the screen, it must obtain a device context for the Windows client area. Windows then fills the device context structure with the attribute values of the device being written to. In MFC, the CDC class wraps a Windows device context and the associated GDI member function for working with the ON_WM_PAINT() handler into one package CPaintDC. The constructor function for CPaintDC is

CPaintDC(CWND *pWnd)

where pWnd is a pointer to the window whose client area will be painted. When creating a device context for the current window, the this pointer is passed to the constructor:

CPaintDC dc(this)

The constructor automatically calls the Windows BeginPaint() function to obtain a device context for the invalid region of the client area. When the CPaintDC object goes out of scope, its destructor automatically calls EndPaint(), releasing the device context and informing Windows that painting is complete.

To respond to a WM_PAINT message in an MFC application, the class must include an ON_WM_PAINT() entry in its message map. This message map entry associates the Windows WM_PAINT message with the class’s OnPaint() member function, which contains the code responsible for repainting the client area.

A typical implementation is:

BEGIN_MESSAGE_MAP(CMyView, CView)
    ON_WM_PAINT()
END_MESSAGE_MAP()

void CMyView::OnPaint()
{
    CPaintDC dc(this);

    // Drawing code goes here
}

When Windows sends a WM_PAINT message, MFC automatically routes the message to the OnPaint() handler, where the application redraws the invalid portion of the window using the CPaintDC object.

Other Useful Device Context-Related Functions

In addition to repainting a window in response to a WM_PAINT message, an application can obtain a device context (DC) whenever it needs to perform drawing operations that are not triggered by the normal painting process.

CClientDC

The CClientDC class creates a device context for the client area of a window that is independent of the OnPaint() handler. It is typically used to perform immediate drawing in response to user actions such as mouse movements or button clicks.

The constructor for CClientDC is:

CClientDC(CWnd* pWnd);

where pWnd is a pointer to the window whose client-area device context is required. To obtain a device context for the current window, pass the this pointer:

CClientDC dc(this);

Passing NULL obtains a device context for the entire screen.

CClientDC (CWND *window)

Where window is a pointer to the window from which the device context is obtained. To invoke a DC for the invoking windows use this as a parameter. To access the entire screen use a NULL pointer.

CWindowDC

The CWindowDC class creates a device context for the entire window, including both the client area and the non-client area.

The non-client area consists of the window border, title bar, menu bar, scroll bars, and the minimise, maximise and close buttons. This area is normally managed by the Windows operating system.

The constructor for CWindowDC is:

CWindowDC(CWnd* pWnd);

where pWnd is a pointer to the window whose device context is required. Passing NULL obtains a device context for the entire screen.

InvalidateRect

The InvalidateRect() function allows an application to manually invalidate part (or all) of a window’s client area. Invalidating a region informs Windows that the area must be repainted. Windows subsequently posts a WM_PAINT message to the application.

void InvalidateRect(LPCRECT lpRect,BOOL bErase = TRUE);

where
lpRect – is a pointer to a RECT structure that contains the update region client coordinates. If this parameter is NULL, the entire client area is set for update.
bErase – Specifies whether the background within the update region is to be erased when the update region is processed. If this parameter is TRUE, the background is erased when the BeginPaint function is called. If this parameter is FALSE, the background remains unchanged.

InvalidateRect() does not repaint the window immediately; it simply marks the specified region as invalid. The repaint occurs later when Windows processes the WM_PAINT message.

ValidateRect

The ValidateRect() function removes a specified region from the update region, informing Windows that the area no longer requires repainting.

void ValidateRect(LPCRECT lpRect);

where:

  • lpRect is a pointer to a RECT structure defining the client-area rectangle to be validated.
  • If lpRect is NULL, the entire client area is validated, meaning that all pending repaint requests for the window are cancelled.

Unlike InvalidateRect(), which requests that a region be repainted, ValidateRect() clears the update region and prevents Windows from sending a WM_PAINT message for that area.

Example

The following short program demonstrates the OnPaint() message by keeping a running total of the times the client area has been repainted. The repaint request can be generated by dragging another window over the application window or by clicking the minimise and maximise icon

Processing Messages

Windows is a message-driven operating system. Every time an event occurs—such as a key press, mouse click, window resize, or paint request—the operating system sends a message to the application. The application must process these messages and respond appropriately.

In MFC, message handling is performed using a message map. A message map tells MFC which member function should be called when a particular Windows message is received.

Declaring a Message Map

The first step is to declare a message map inside the class definition (usually in the header file) using the macro:

DECLARE_MESSAGE_MAP()

This macro informs MFC that the class contains message-handling functions.

Example:

class CMainFrame : public CFrameWnd
{
public:
    CMainFrame();

protected:
    afx_msg void OnLButtonDown(UINT nFlags, CPoint point);

    DECLARE_MESSAGE_MAP()
};

Defining the Message Map

The message map is defined in the implementation (.cpp) file.

It begins with:

BEGIN_MESSAGE_MAP(ClassName, BaseClass)

and ends with:

END_MESSAGE_MAP()

Between these two macros are entries that associate Windows messages with handler functions.

Example:

BEGIN_MESSAGE_MAP(CMainFrame, CFrameWnd)
    ON_WM_LBUTTONDOWN()
END_MESSAGE_MAP()

Here:

  • CMainFrame is the class implementing the message map.
  • CFrameWnd is its base class.
  • ON_WM_LBUTTONDOWN() maps the left mouse button click message (WM_LBUTTONDOWN) to the handler OnLButtonDown().

Message Handler Functions

Each mapped message has a corresponding member function called a message handler.

Message handlers are declared with the afx_msg specifier.

Example:

afx_msg void OnLButtonDown(UINT nFlags, CPoint point);

Implementation:

void CMainFrame::OnLButtonDown(UINT nFlags, CPoint point)
{
    MessageBox(TEXT("Left mouse button clicked!"));
}

When the user clicks the left mouse button, MFC automatically calls OnLButtonDown().

Naming Convention

Message handler names generally follow this pattern:

On + MessageName

Examples include:

  • OnPaint() → Handles WM_PAINT
  • OnCreate() → Handles WM_CREATE
  • OnClose() → Handles WM_CLOSE
  • OnSize() → Handles WM_SIZE
  • OnLButtonDown() → Handles WM_LBUTTONDOWN
  • OnKeyDown() → Handles WM_KEYDOWN
Windows MessageMessage Map MacroHandler Function
WM_PAINTON_WM_PAINT()OnPaint()
WM_CREATEON_WM_CREATE()OnCreate()
WM_CLOSEON_WM_CLOSE()OnClose()
WM_SIZEON_WM_SIZE()OnSize()
WM_LBUTTONDOWNON_WM_LBUTTONDOWN()OnLButtonDown()
WM_KEYDOWNON_WM_KEYDOWN()OnKeyDown()

MFC provides macros for over 100 different Windows messages, making it easier to handle common events without manually writing a Windows message loop.